Custom Bot
Custom Bots let you run an instance of Invite Tracker on your own application.
Premium feature
This feature requires the Custom Bot tier of Invite Tracker Premium. You can purchase it here and read about what it offers.
If you have the applicable subscription already, let's get started with making an application for Invite Tracker to run on. It is highly recommended you follow this tutorial step by step. Should you run into any issues, you may join our support discord. You may skip this part if you already know what you're doing.
Creating an Application
Let's start by heading over to the Discord Developer Portal. Make sure you're logged into the desired account and click the button New Application at the top right of the page below your avatar.

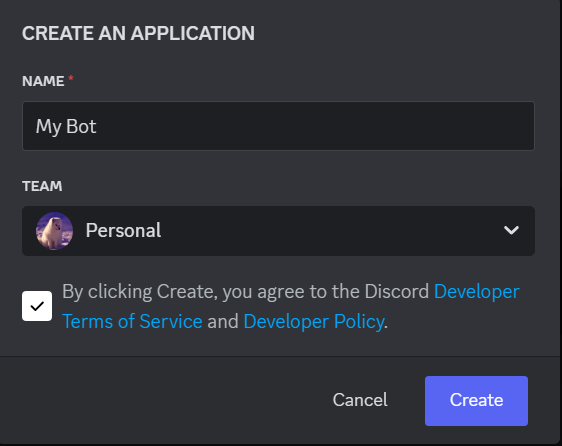
Choose a name for your new application and agree to the terms and conditions. After, click Create.
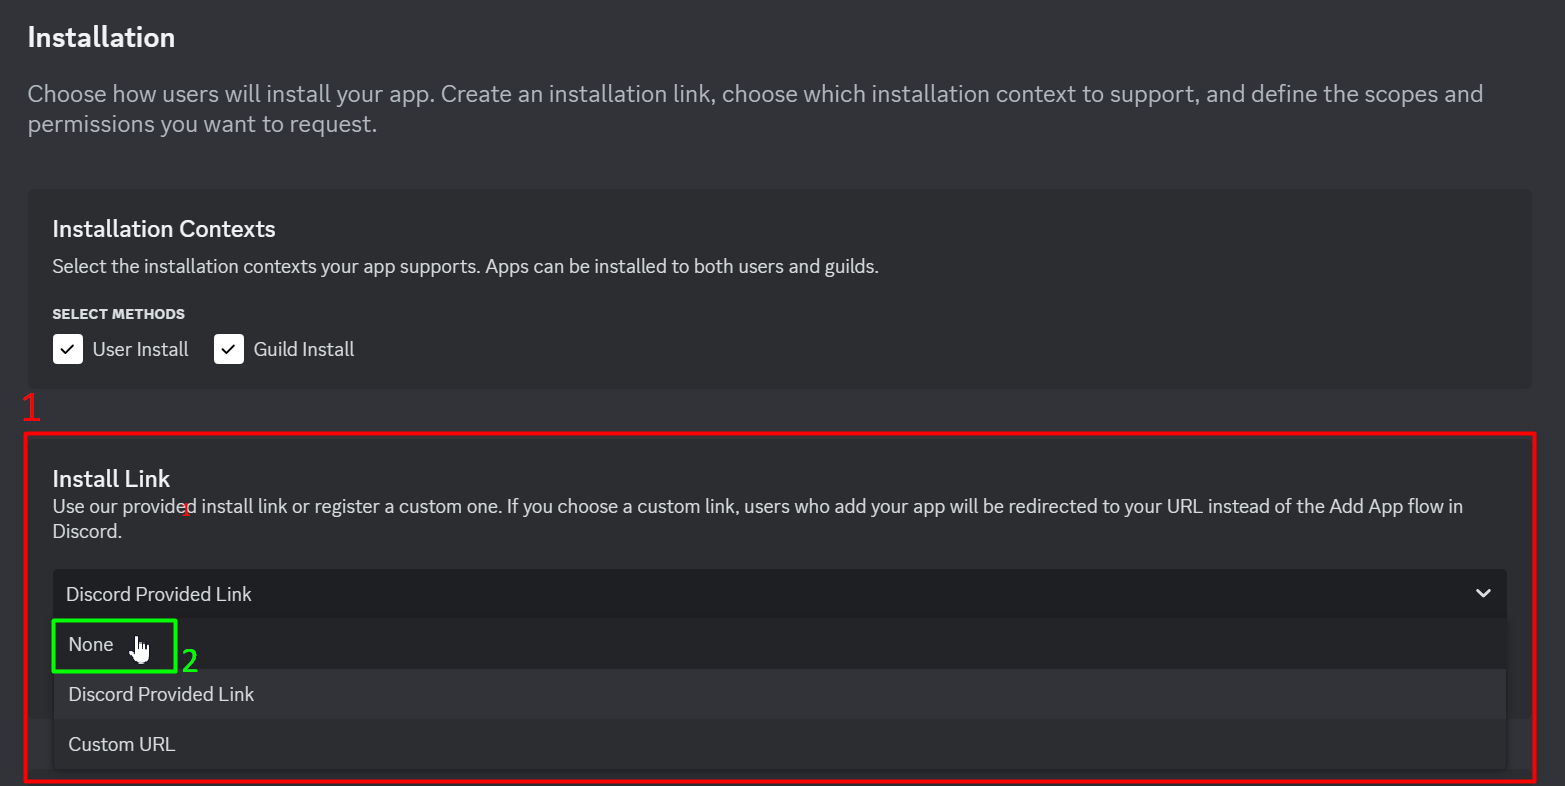
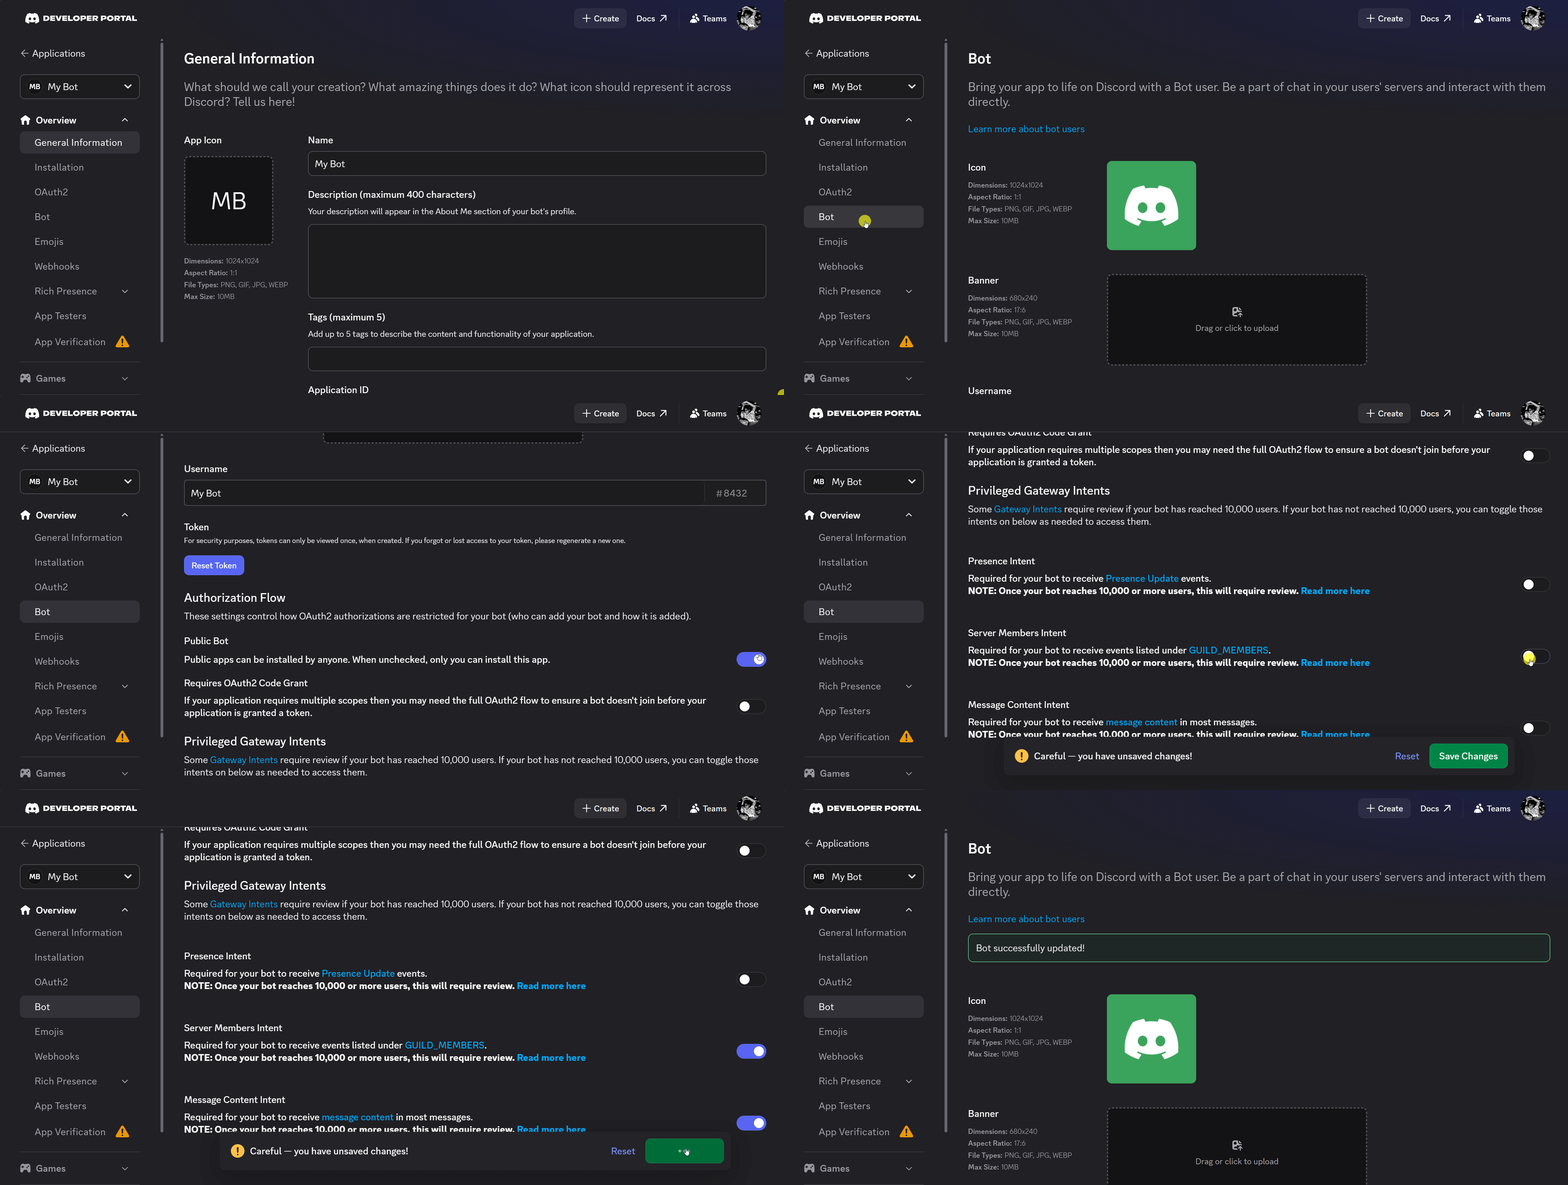
First, head to the Installation tab on the left. (1) Select the dropdown menu in Install Link and (2) select the None option.
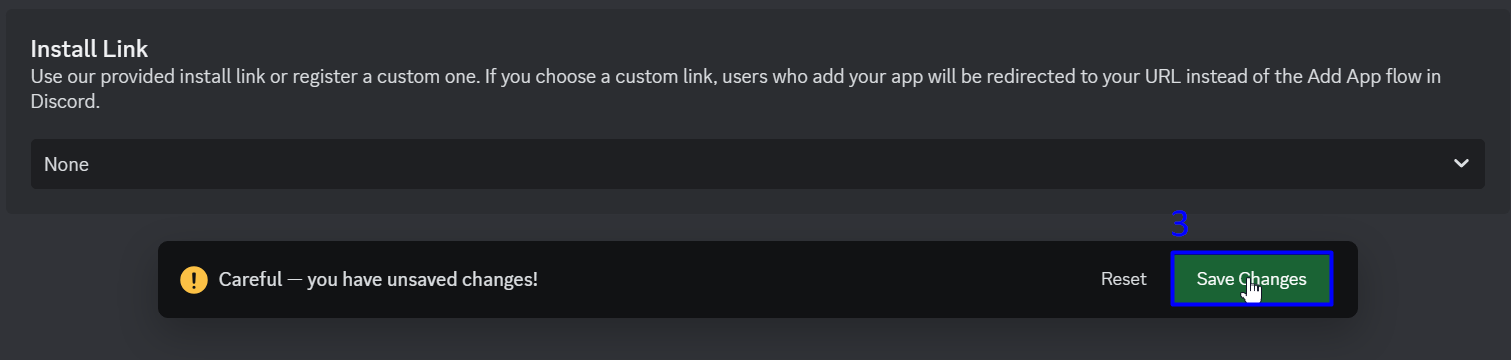
(3) Confirm Install Link is set to None. Save Changes.
Next, head to the Bot tab. From there, disable the Public Bot option and enable both the Server Members Intent and Message Content Intent options.
DANGER
Both intents are required: the custom bot will not work without the Server Members Intent option, and ticket transcripts require the Message Content Intent option.
Server with 10,000+ members?
Discord requires applications that can reach 10,000+ users to apply for Privileged Intent access — for a custom bot, that means a server with 10,000+ members. See Custom Bot: Privileged Intent Review for a full walkthrough of the form, including ready-to-use answers.
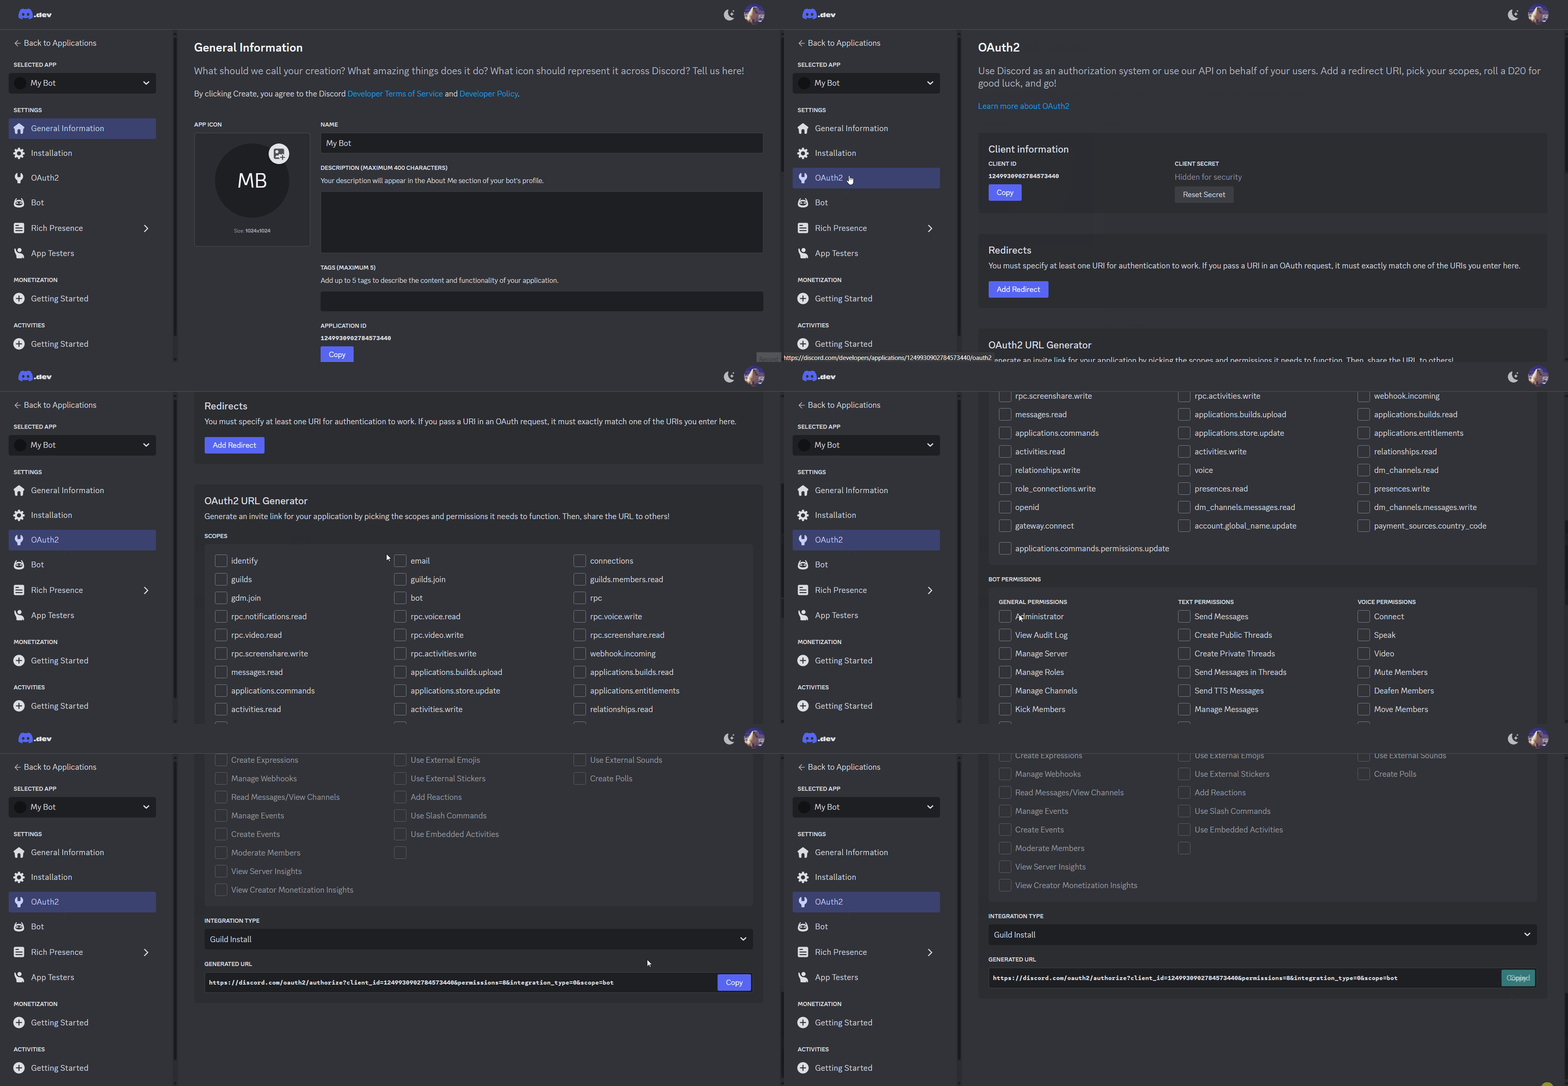
To invite the custom bot to your server, head to the OAuth2 tab on the left. Select bot in OAuth2 URL Generator and Administrator in Bot Permissions. You will then be able to use the Generated URL to invite your custom bot to the server by copying and pasting the link into your browser. You could also copy and paste the link into your discord, clicking the link to invite the custom bot.
DANGER
Do not use the Installation tab to invite the bot. Please follow the steps provided through the OAuth2 tab.
TIP
For this tutorial, administrator allows the custom bot to function as efficiently as possible. You may still choose to use the default Invite Tracker permissions. Click here to see them.
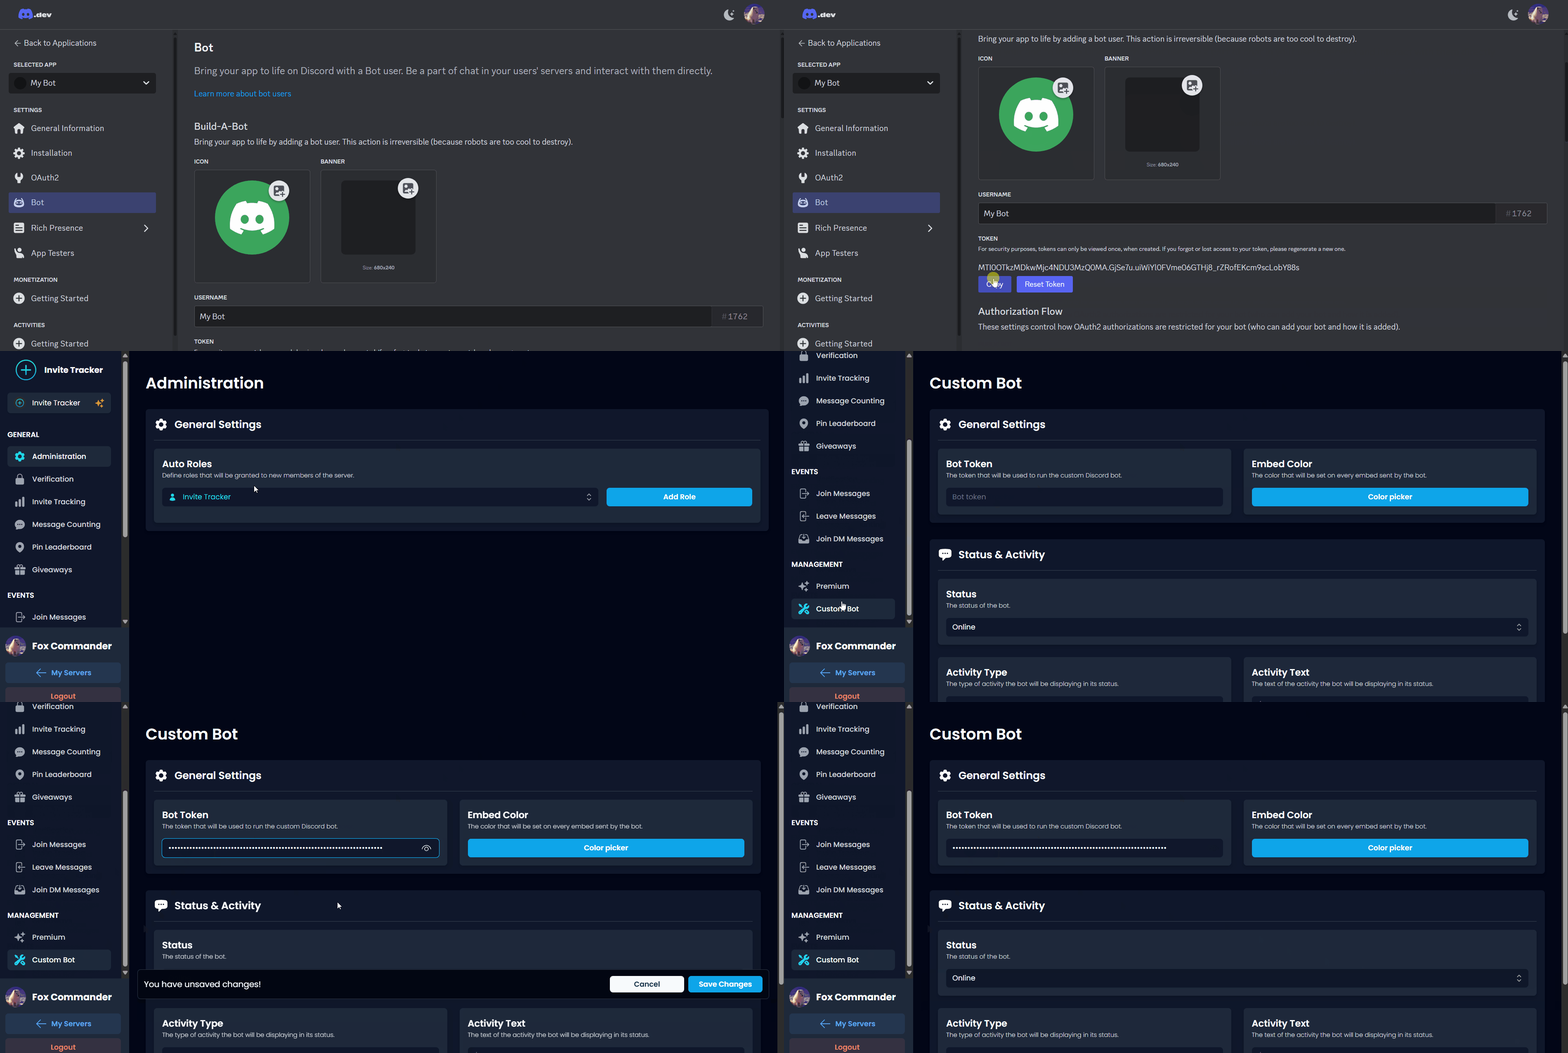
After inviting your custom bot, we need to activate it. Head to the Bot tab on the left and copy your token. On the server with the Custom bot tier, you will see a new plugin called Custom Bot, then paste the copied token into Bot Token and save changes. There are no further steps. Should you run into any issues, you may join our support discord.
WARNING
The bot token input disappearing is an intended feature. Please make sure to save your bot token separately.
TIP
Please allow a couple of minutes for the bot to come online.
Embed Color
Customize the embed color sent by the custom bot with the color picker.

Status & Activity
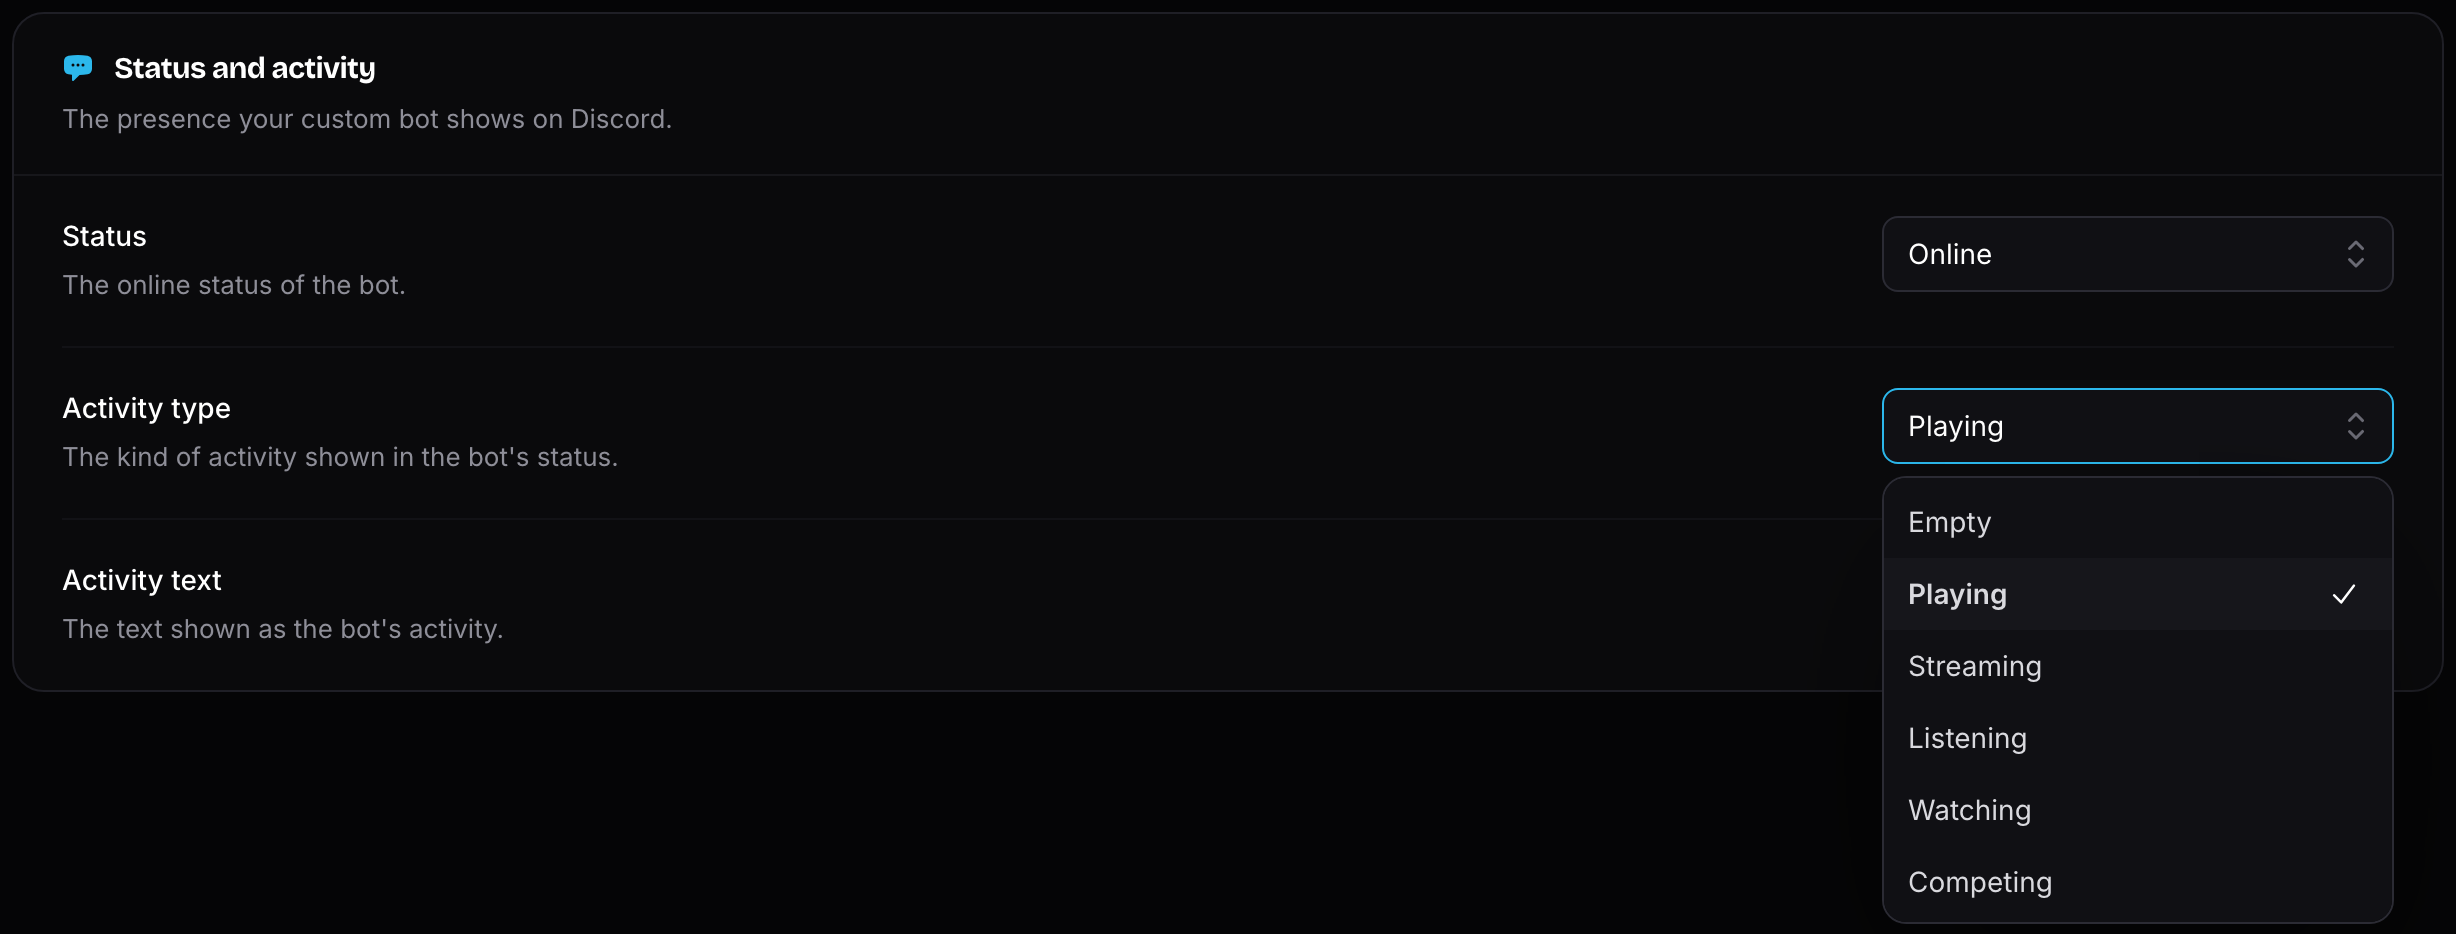
You will be able to customize the custom bot's status and activity status as well.
There are 4 statuses you can choose from:
- Online
- Invisible
- Idle
- Do Not Disturb

There are a variety of activity types you may choose from along with being able to customize the text that displays after the type.